Get in Touch with Liehuang Company
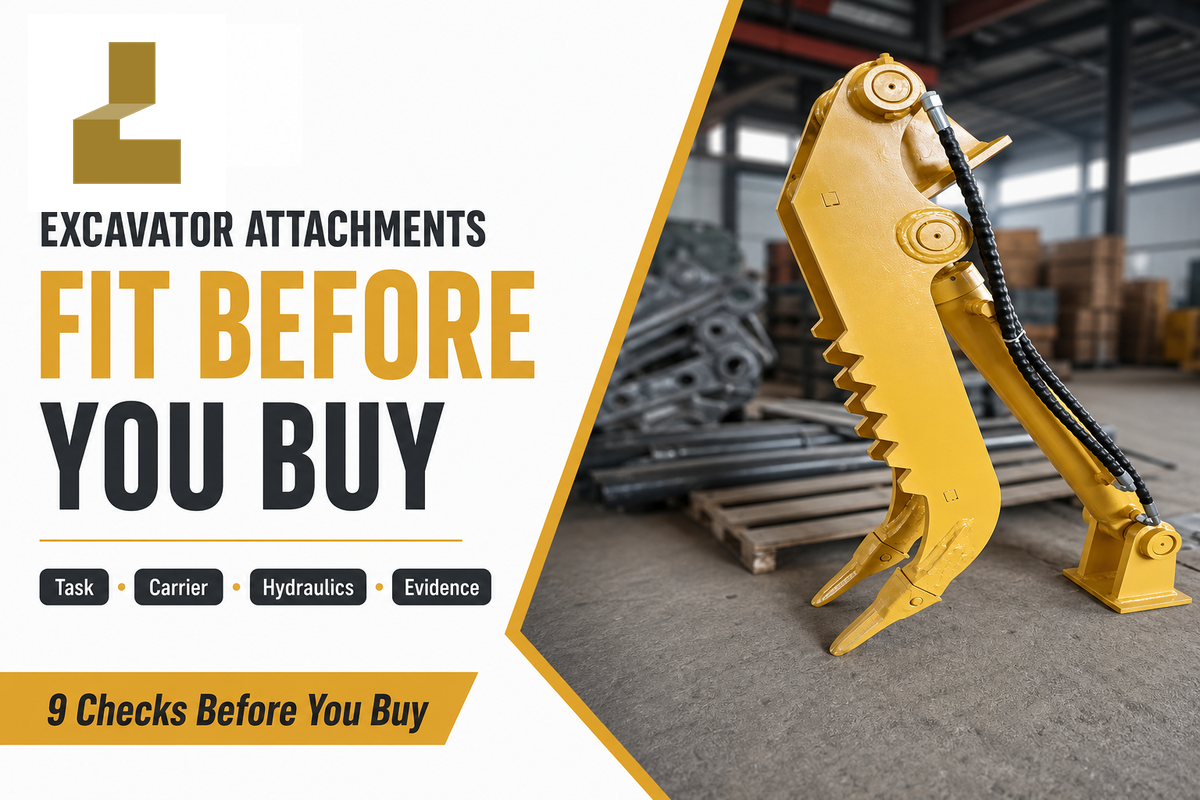

Excavator attachments are task-specific tools mounted to a carrier’s linkage or auxiliary circuit to dig, break, grip, drill, compact, cut, or handle material. Each bucket, breaker, grapple, thumb, ripper, auger, rake or coupler needs to suit the job, material, carrier, hydraulic circuit, mounting dimensions, lift boundary and site controls. This guide gives procurement teams a reproducible method for shortlisting a tool and creating an RFQ that a supplier can readily check.
Updated July 2026 · Prepared for global importers, distributors, contractors, and fleet managers · Reviewed by the Hefei Liehuang Machinery Co., Ltd. technical team
Bottom line
Choose by job first, then prove nine carrier-to-tool inputs. A same-ton class, a familiar brand, or a catalogue photo is not fitment proof.
TL;DR
- Counterintuitive: the cheapest attachment can be the most expensive choice if it creates a hose, pin, or downtime problem.
- Write the job and material brief before naming a tool.
- Check carrier model, operating weight, auxiliary flow, pressure, return line, pin geometry, coupler, attachment mass, and lift radius.
- For used equipment, request serial, wear, weld, hose, pin, and functional evidence before shipment.
- Separate ordinary earthmoving from lifting operations; local rules may require competent-person examinations and safety devices.
Quick specifications to collect
- Carrier: make, model, operating weight, stick and coupler arrangement
- Tool: attachment family, mass, pin diameter, center distance, width
- Hydraulics: auxiliary flow, working/peak pressure, return-line and back-pressure limits
- Job: material, reach, cycle, ground conditions, finish tolerance, site hazards
- Evidence: manuals, photos, serial plate, inspection video, and delivery acceptance plan
For a construction RFQ, record units exactly as supplied: 5 mm, 10 mm, 15 mm, 20 mm, 25 mm, 30 mm, 35 mm, 40 mm, 45 mm, 50 mm, 60 mm, 70 mm, 80 mm, 90 mm, 100 mm, 120 mm, 150 mm, and 200 mm may describe different pin, bush, hose, tooth, or opening measurements. These are field labels to capture, not universal fit recommendations.
Start With the Job, Not an Attachment Catalog
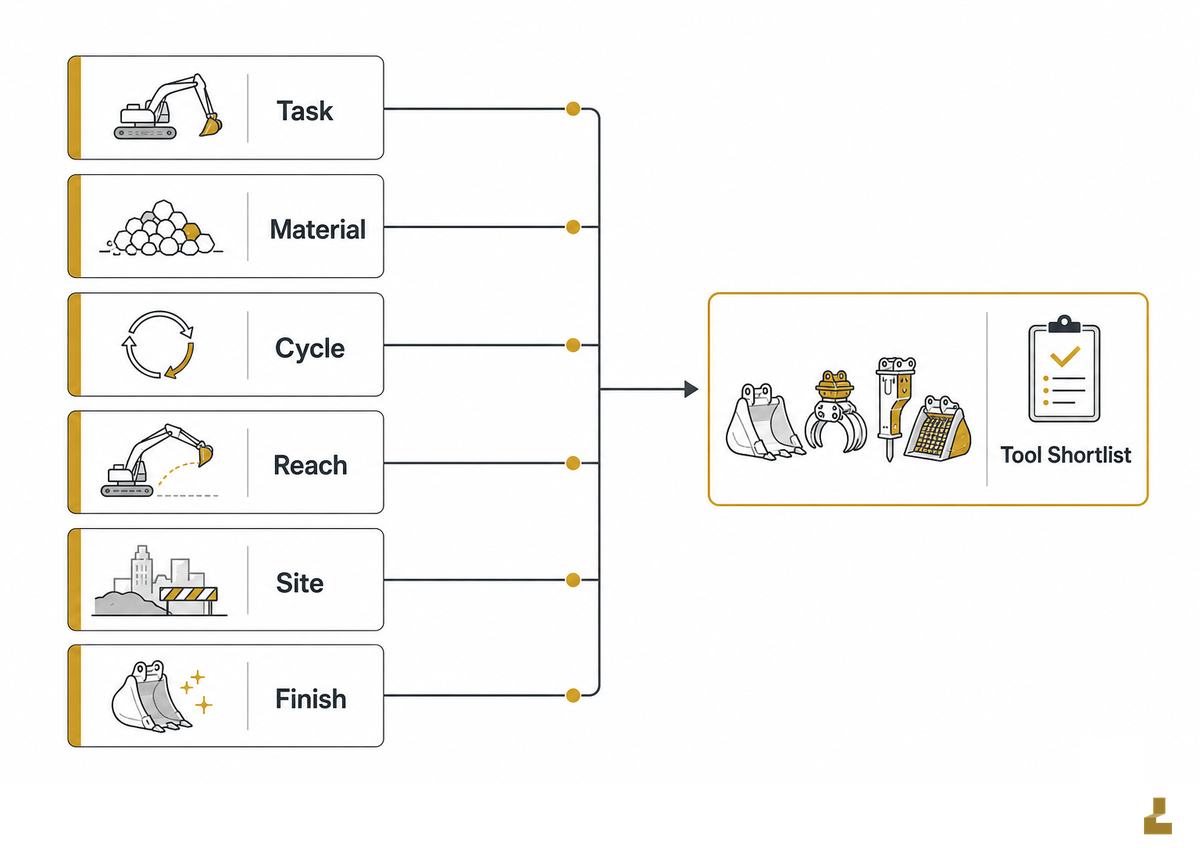
Start with six facts: task, material, cycle, reach, site limits, and required finish. A trenching job in compacted clay asks for a different tooth profile and bucket width than sorting demolition steel. A landscaping crew may value a narrow bucket and thumb visibility; a land-clearing crew may value grapple control and hose protection. A clear job brief prevents a catalog from becoming the decision-maker.
Buyer-side rule: Treat excavator attachment compatibility as a nine-input proof exercise. Even a 20-ton label can fail because a 50 mm pin, incomplete hydraulic data, or missing site-risk controls change the decision. Liehuang can inspect and document the attachment, but the carrier manual and NIOSH’s struck-by prevention factors show why machine and work-zone controls remain part of the check.
- Name the task. Dig, break, grade, sort, lift, compact, drill, rake, or clear.
- Describe the material. Soil, rock, concrete, timber, mixed debris, wet waste, or frozen ground.
- State the cycle. Occasional use, repeated production, loading trucks, or precision placement.
- Record reach and access. Working radius, trench width, overhead limits, and transport constraints.
- Define the finish. Rough excavation, clean trench, screened material, or placed load.
- List hazards. Utilities, edges, people, overhead services, traffic, and lifting rules.
Your goal is a shortlist—not a PO. Only once these six constraints are identified should you refer to the commercial excavator attachment options and supplier support pages.
Excavator Attachment Types by Job and Material
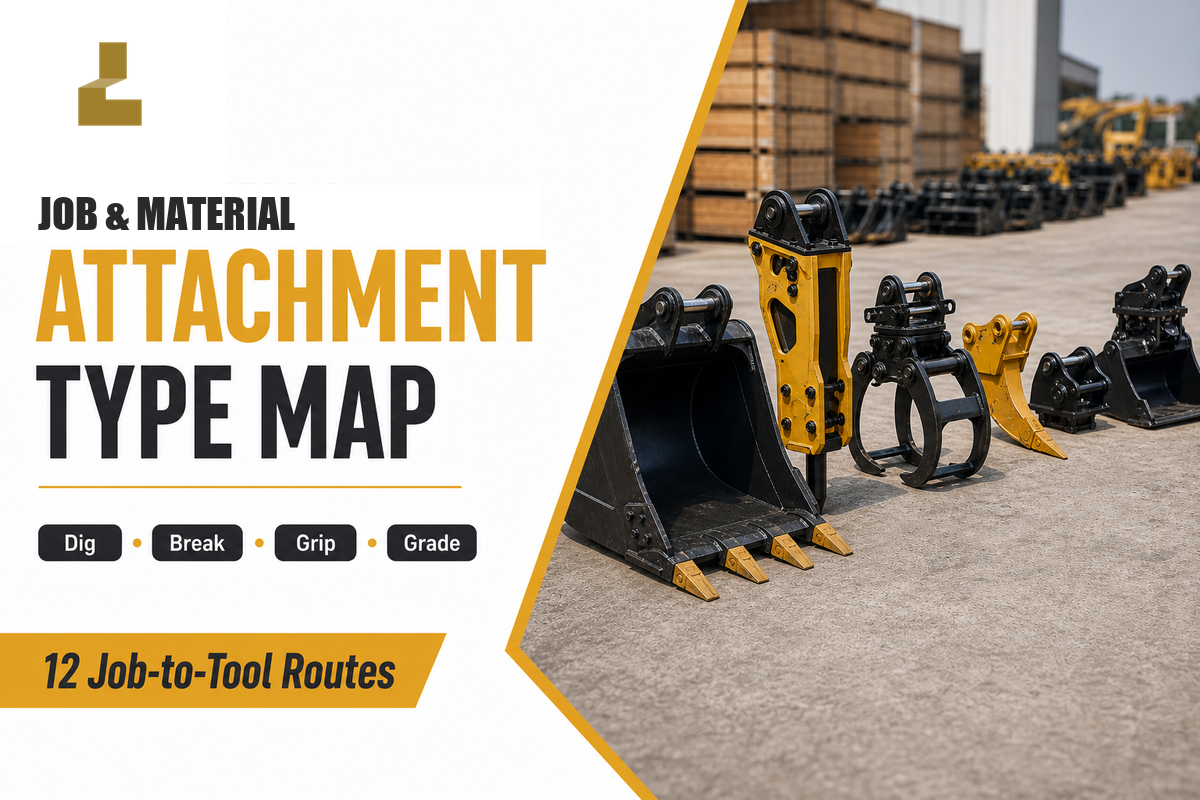
The attachment families overlap but their constraints don’t. Use this matrix as a first-cut filter: all entries require the carrier and hydraulic checks below. Heavy-duty buckets, drum mulchers, and wide grading buckets can improve productivity, but added mass and rotation envelope still need separate checks. For gripping or lifting-adjacent work, NIOSH’s prevention guidance reinforces the need to keep workers clear of raised attachments and other loads.
| Job / material | Attachment type | Why it fits | Limit / do not use when |
|---|---|---|---|
| General soil | Excavator bucket | Balanced fill and digging geometry | Do not use a light bucket in abrasive rock |
| Narrow trench | Narrow bucket | Controls trench width | Do not sacrifice breakout force for width |
| Hard rock | Hydraulic breaker | Concentrates impact energy | Do not run outside flow or back-pressure limits |
| Layered hard ground | Ripper | Pre-loosens material | Do not use where vibration or utilities are unacceptable |
| Logs and brush | Grapple | Captures irregular material | Do not assume lifting approval from gripping ability |
| Mixed demolition | Sorting grapple | Separates steel, timber, and rubble | Do not use for oversized loads beyond chart limits |
| Stone placement | Hydraulic thumb | Controls irregular pieces | Do not ignore stick and pin interference |
| Surface preparation | Rake | Pulls roots and loose debris | Do not use teeth as a breaker substitute |
| Post holes | Auger | Repeats a defined diameter | Do not run with unknown torque or spoil conditions |
| Slope trimming | Tilt bucket | Changes angle without repositioning | Do not exceed cylinder or hose articulation limits |
| Vegetation | Brush cutter | Cuts a defined vegetation zone | Do not operate without guarding and exclusion controls |
| Compaction | Plate compactor | Applies vibration to a trench or pad | Do not use where vibration may damage utilities |
For deeper family comparisons, see the excavator bucket guide and excavator thumb guide; hydraulic breaker specifics appear with the circuit checks below.
Ton Class Is Only a Filter: The 9-Input Carrier-to-Tool Fit Map
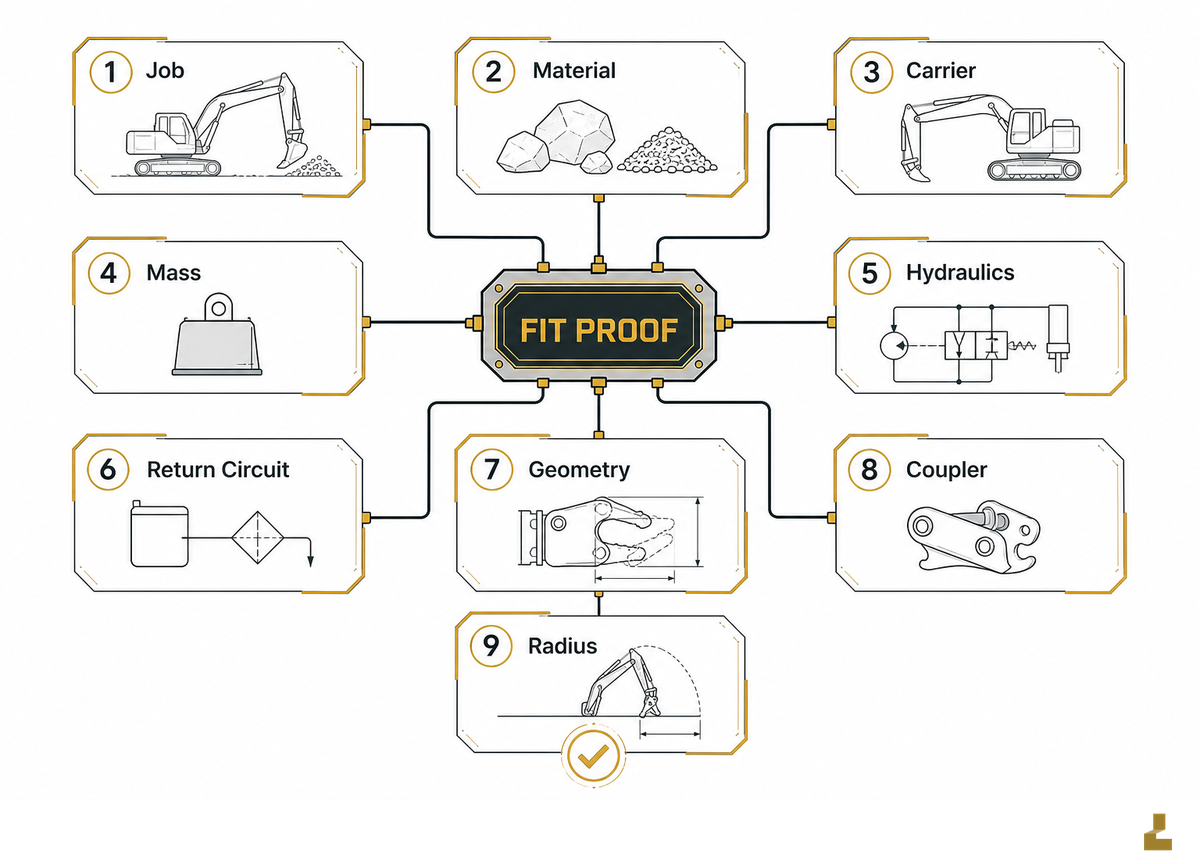
Ton class narrows the search; it doesn’t prove fit. The same nominal class can hide different pin centers, stick widths, auxiliary circuits, couplers, counterweights, and configuration-specific lift charts. Use The 9-Input Carrier-to-Tool Fit Map before requesting a final quote.
For this site’s first routing step, mini 0–10 t, medium 10–30 t, and heavy 30 t+ are navigation bands, not compatibility limits. For mini excavator attachments, record linkage geometry rather than borrowing a nominal ton-class label. Where a quick coupler is involved, the official ISO 13031 record provides safety context but does not prove a particular carrier-to-tool fit.
| Input | Record | Why it matters | Stop condition |
|---|---|---|---|
| 1. Job | Task and finish | Sets tool family | No defined task |
| 2. Material | Density, abrasion, size | Sets wear and tooth choice | Unknown hard inclusions |
| 3. Carrier | Make, model, serial family | Manuals and charts are model-specific | Model guessed from photos |
| 4. Mass | Operating weight and counterweight | Changes stability | No current configuration |
| 5. Hydraulics | Flow, working/peak pressure | Prevents slow or damaged tools | No measured circuit data |
| 6. Return circuit | Return line and back pressure | Protects motors and seals | Supplier cannot state limit |
| 7. Geometry | Pin diameter, centers, width | Makes the mechanical connection possible | “Same ton class” only |
| 8. Coupler | Type, latch, indicator, hose path | Controls engagement | Lock cannot be demonstrated |
| 9. Radius | Load shape and working radius | Maps to the lift chart | No chart for actual setup |
Use the site’s attachment compatibility checker as a second review, not as a substitute for the carrier manual. A first-party audit of five public client pages found useful product and export scope, but two model pages didn’t expose every hydraulic or pin field. That’s a data-availability warning, not a claim that the machines can’t fit.
How Much Hydraulic Flow and Pressure Does the Tool Need?
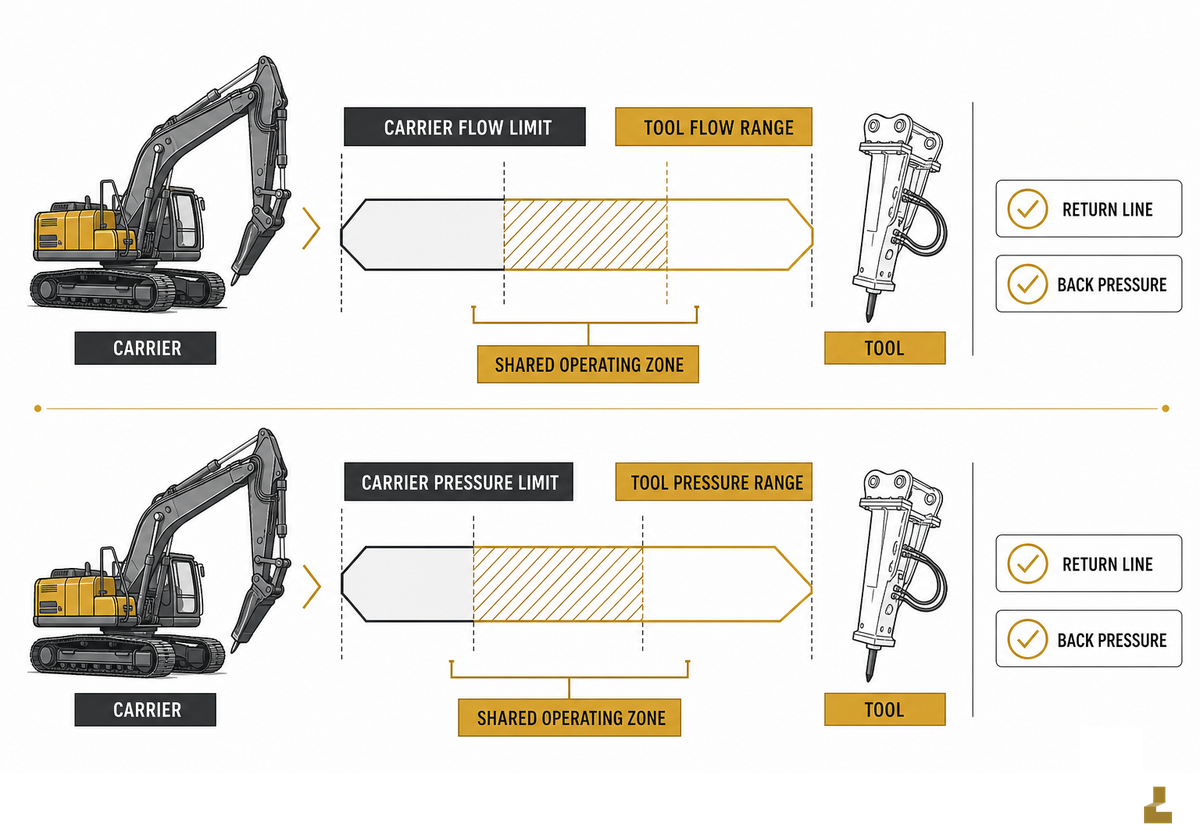
Compare the carrier’s measured auxiliary flow and pressure against the operating range requirements stated for the attachment, then check the return line and back pressure. A “high-flow” designation in a brochure isn’t a measurement. Seek units, permissible tolerance, motor displacement or breaker class, and whether reported flow is one-way or two-way.
ISO 4413:2010 sets general rules and safety requirements for hydraulic systems and components; it does not supply a machine-specific attachment range. Don’t borrow an operating range from a skid steer or backhoe brochure; verify the excavator circuit.
Worked example. Suppose a carrier auxiliary circuit is verified at 30 L/min and 200 bar. A tool sheet states 24–32 L/min and 180–210 bar. Flow intersection is 24–30 L/min; pressure intersection is 180–200 bar. Those comparisons pass, but the result remains conditional: confirm return-line pressure, coupler hoses, relief settings, duty cycle, and the carrier manual before running it. This arithmetic is illustrative, not a universal attachment range.
- Record measured carrier flow at the intended circuit setting.
- Record working and peak pressure separately.
- Request return-line and back-pressure limits.
- Check hose, port, quick-coupler, and filtration requirements.
- Run a low-load test and stop for heat, noise, leaks, or weak response.
An oil-flow compatibility checker organizes comparisons; the hydraulic breaker guide adds family specifics.
How Attachment Weight Changes Lift and Stability
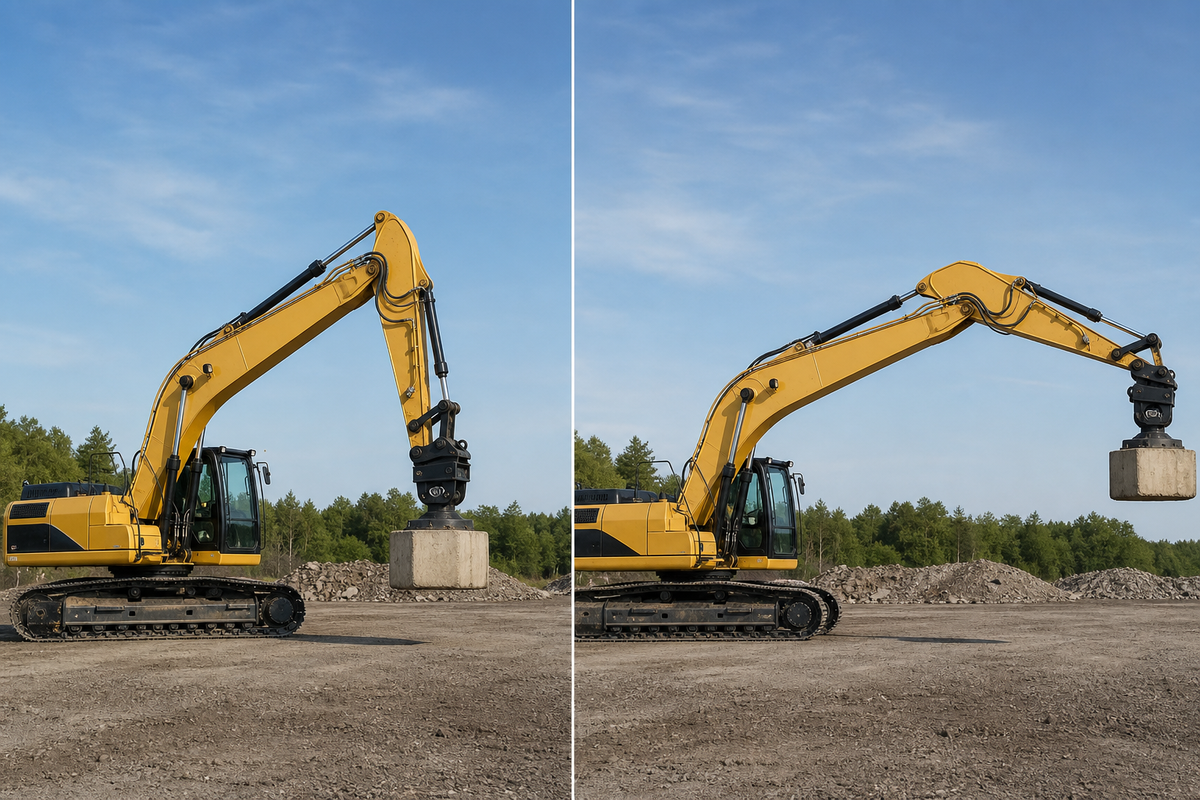
Attachment mass consumes part of the carrier’s available lifting envelope before payload is added. Read the OEM lift chart at the actual radius, track or outrigger configuration, boom position, and attachment geometry. CAT’s lift-capacity guidance emphasizes using the correct chart and configuration; a generic ton-class rule can’t replace it.
Keep ordinary earthmoving separate from lifting. HSE’s excavator guidance states that, in the UK, an excavator used for lifting must be thoroughly examined by a competent person and fitted with additional safety devices; the requirement also covers occasional lifting. Local law and site rules control. Never turn a grapple or bucket purchase into an implied lifting authorization.
Do
- Use the actual attachment mass.
- Check the chart at working radius.
- Define a controlled exclusion zone.
- Use competent operators and supervision.
Don’t
- Assume a lift is safe because the pin fits.
- Work beneath a suspended attachment.
- Use a catalog weight as the current setup.
- Ignore site-specific utility or edge hazards.
How Should You Inspect a Used Attachment Package?

Used attachment inspection should produce evidence, not adjectives. Request a serial-plate photo, full-side views, close-ups of pins and bushes, welds, cylinders, hoses, teeth, motor ports, guards, coupler faces, and any repair area. Ask what was refurbished, what was tested, and what remains outside the seller’s knowledge.
For a quick-coupler package, OSHA’s securing bulletin makes the lock interface and engagement evidence a safety-critical inspection item.
- Measure pin diameter, center distance, and stick width; don’t infer them from paint.
- Look for oval holes, cracked weld toes, bent brackets, uneven teeth, and repaired ears.
- Check hydraulic seals, hose abrasion, port caps, contamination, and unexplained heat marks.
- Match the serial plate and photos to the quotation and packing list.
- Mark repair-before-ship items in writing and attach acceptance photos to the order.
Liehuang’s stated scope is inspection, refurbishment, testing, export logistics, and support for used excavators and attachments; it doesn’t replace a buyer’s site-specific examination. Use the wider used excavator buying guide for machine-level checks.
What Should an Attachment RFQ Include for Product Fit, Price, and Quality?
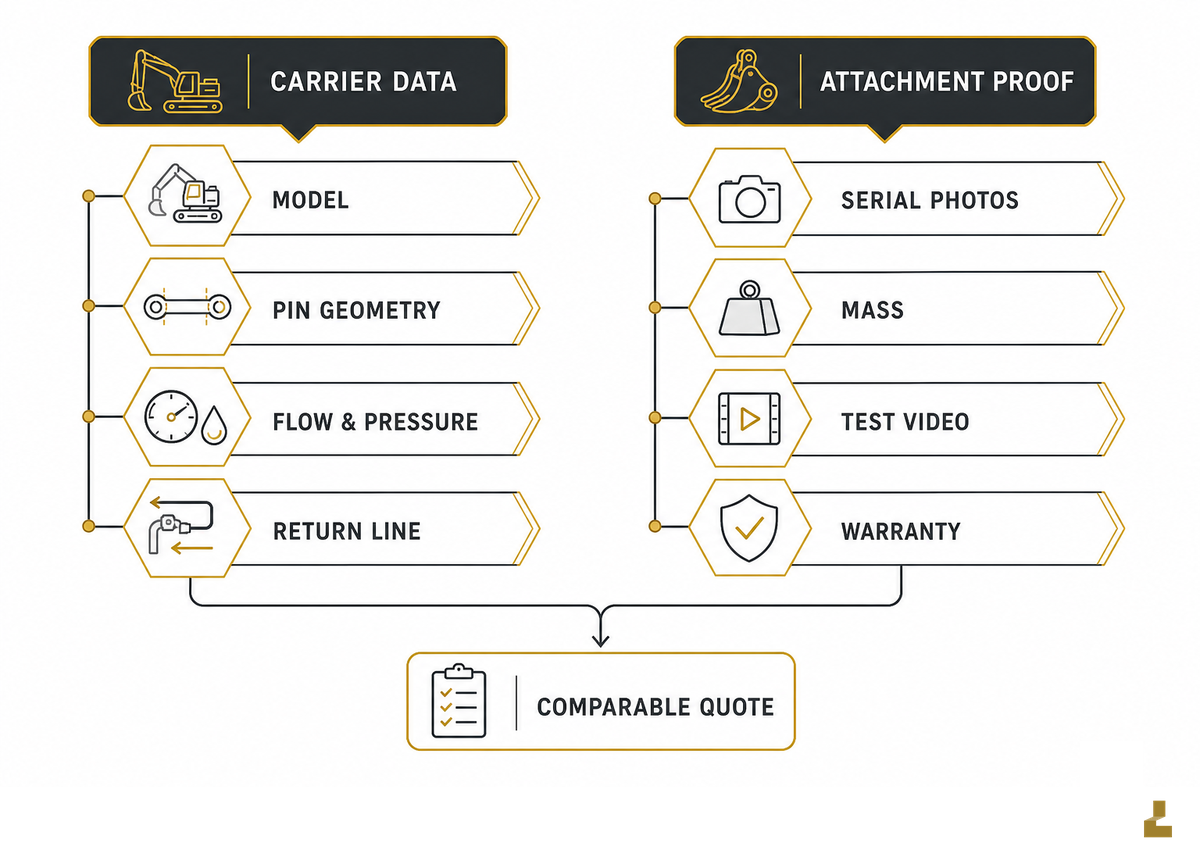
Supplier quotes become accurate only when the RFQ contains the nine fit inputs plus the job and evidence requirements. Send the carrier manual pages or measured values where available. Keep product inventory and price comparisons on the commercial page. That keeps technical and commercial comparisons separate.
The RFQ below is a structured data-quality tool. For a professional fleet or rental business, treat “tough” and “manufacturing quality” as sales claims until the supplier ties them to steel grade, weld-repair history, pin hardness, and written warranty exclusions. For quick couplers, include the manufacturer’s connection-test procedure and pre-use locking evidence described in OSHA’s securing guidance.
RFQ checklist — copy these into your quote request:
| Parameter | Recommended range | Why it matters | How to verify |
|---|---|---|---|
| Carrier model and serial family | Exact, not ton class only | Links the right manual | Plate and manual |
| Job and material | Specific task | Selects family and wear class | Job brief |
| Pin diameter and centers | Measured values | Prevents wrong mounting | Caliper and sketch |
| Auxiliary flow | Tool range intersection | Controls performance | Test or manual |
| Working and peak pressure | Tool limit respected | Protects seals and motor | Manual |
| Return/back pressure | Supplier stated | Avoids overheating | Hydraulic sheet |
| Attachment mass | Current unit | Maps to lift chart | Weigh ticket or spec |
| Inspection evidence | Serial, photos, test video | Makes used condition auditable | Dated media |
For export planning, add destination, packing dimensions, net/gross weight, documents, and preferred shipping mode. The weight-class shipping selector helps organize that handoff, while the attachment supplier page is the next commercial step.
How Do You Verify Coupler, Pin, and Equipment Fit at Delivery?

Delivery acceptance should repeat the identity and fit checks before normal work begins. Keep people outside the attachment’s movement zone, use the manufacturer’s installation procedure, and stop if any veto condition appears. Before you install the package, match every acceptance field to the RFQ and carrier manual.
- Verify identity. Match serial, model, dimensions, and photos to the RFQ.
- Verify mounting. Confirm pins, bushes, coupler faces, hose routing, and clearance.
- Verify locking. Operate the lock, inspect the indicator, and complete the manufacturer’s engagement check.
- Run no-load motion. Check leaks, interference, abnormal noise, and control response.
- Run a controlled low-load test. Monitor heat, pressure, stability, and attachment behavior.
Five vetoes stop acceptance: wrong identity, failed lock, hose interference, abnormal no-load behavior, or leak/overheating under low load. OSHA’s quick-coupler bulletin describes the consequence of inadequate securing, while NIOSH advises workers to assume a quick coupler can fail and never stand beneath an attachment or other load. The engagement test is a control, not a guarantee that training, supervision, exclusion zones, or maintenance can be skipped. See the quick-coupler safety checklist and coupler pin fitment checker.
Coupler Safety and Hydraulic Data Are Raising the RFQ Bar
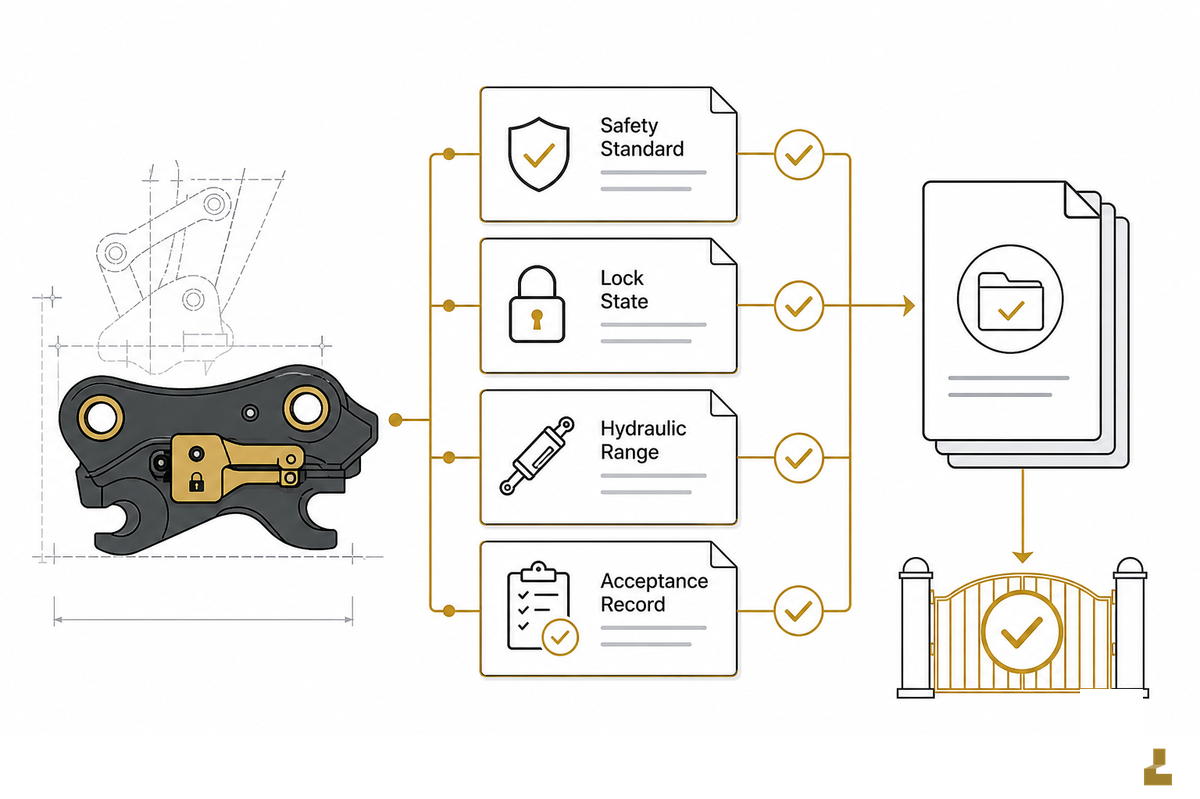
ISO 13031:2016/Amd 1:2025 is listed by ISO as a published amendment. For a 2025 coupler RFQ, keep the official ISO page with the supplier’s lock-state and acceptance records. Ask for the warning or indicator method, hydraulic range, and return-line limit as well.
Market forecasts may explain interest in multifunction tools, but they do not prove a tool’s fit or safe use. Patent records show technology direction, not adoption. Keep the RFQ evidence-led.
Geith engineering manager Tony McKeown, who says he joined the ISO 13031 development committee in 2009, summarized the standard’s role this way: Standards are a measure of quality attainment to defined and established performance criteria.
This is attributed vendor-engineer context; the ISO record remains the formal source for amendment status.
A 2015 IAARC prototype study tested passive UHF-RFID attachment identification on a real excavator. No tested setup achieved 100% identification, and about 38% of required readings produced no reading. Treat automatic identification as a design lead with a manual fallback, not as proof of current adoption or a substitute for physical verification.
FAQ: Excavator Attachments
Can one attachment be used on all mini excavators?
No—mini excavators still differ in pin geometry, hydraulics, couplers, stick width, operating weight, and lift limits, so a carrier-specific fit check is required before use.
No. Mini excavators vary in operating weight, pin geometry, auxiliary flow, pressure, coupler design, stick width, and lift chart. One bucket or thumb may fit one mini excavator yet be mechanically incompatible or hydraulically unsuitable on another. Confirm the nine inputs, then use the carrier and attachment manuals. “Mini” is a search filter, not a universal mounting standard.
What information is needed to match an attachment to an excavator?
A complete match needs the carrier identity, fit dimensions, hydraulic limits, attachment mass, working radius, job, and site hazards before a supplier can approve fit.
Send the exact carrier make and model, operating configuration, job and material, pin diameter and center distance, stick width, coupler type, attachment mass, auxiliary flow, working and peak pressure, return-line/back-pressure limits, working radius, and site hazards. Add photos, serial information, and the required finish. Those fields let a supplier distinguish a real fit from a same-ton-class guess.
Can the same attachment fit two excavators in the same ton class?
Sometimes, but equal ton class does not prove matching geometry, hydraulics, coupler fit, or lift margin; verify every field separately for both carriers before shared use.
Sometimes, but the ton class doesn’t prove it. Both carriers still need matching pin centers, diameter, width, coupler geometry, hydraulic range, hose and port arrangement, and enough lift-chart margin. Pin-on tools may require a different bracket or bushes; hydraulic attachments may need different circuits, port sizes, relief settings, and return-line controls. Treat cross-carrier use as a new verification exercise.
Which attachment should a buyer choose first?
Choose the attachment family that matches the primary job and material, then verify its limits against the carrier before requesting a final quote or purchase.
Choose the attachment family that matches the primary job and material, then shortlist a second option for the main limitation. Buckets aren’t automatically the best first tools for rock; grapples aren’t automatically lifting devices; breakers aren’t rippers. The best first choice depends on material, finish, cycle, and carrier limits. Start with the job brief and matrix, then prove fit and safety.
How should a used hydraulic attachment be inspected before shipping?
Inspect identity, wear, repairs, hydraulics, guards, and function with dated photos and a controlled test video, then make every unknown condition a written quote exclusion.
Request dated photos and a functional video showing the serial plate, pins, bushes, welds, cylinders, hoses, ports, guards, teeth or tool, and coupler interface. Ask what was refurbished and tested. Record leaks, oval holes, cracks, bent brackets, missing guards, and unknown repairs as repair-before-ship or reject items. Request a dated walk-around, a no-load function video, and a written list of parts that weren’t opened or measured. Include close-ups of the cutting edge, tool point, bush seats, cylinder rods, relief valves, motor casing, and every weld repair. Note whether grease passages accept grease, whether hoses carry matching fittings, and whether the attachment was tested at operating temperature. If a supplier can’t identify a serial plate, explain a repair, or demonstrate the function safely, mark the field unknown and make it a quote condition rather than assuming the best case. Match the final inspection pack to the quotation, packing list, and delivery acceptance form.
What evidence should a supplier provide before shipment?
Before shipment, require fit dimensions, hydraulic limits, mass, identity evidence, inspection results, repair scope, test video, and packing documents so the buyer can compare complete packages.
Request a dimensioned fitment sheet, hydraulic requirements, attachment mass, serial and identity photos, inspection findings, repair scope, test video, packing dimensions, and shipping documents. For a quick coupler, request the locking method and engagement evidence. For lifting work, confirm local examination and safety-device requirements independently. A responsive supplier should be able to identify unknown fields instead of guessing.
Key takeaway
A clean attachment purchase is a documented chain from job brief to fit map, hydraulic intersection, lift boundary, used-condition evidence, and delivery acceptance.
Need help preparing the package?
Liehuang exports inspected used excavators and attachments across mini, medium, and heavy classes, including buckets, hydraulic breakers, grapples, and specialized tools. Share your carrier model, job brief, nine fit inputs, and destination so the team can identify missing data and prepare a practical quote.
References and Sources
- OSHA: Hazards of Inadequately Securing Hydraulic Excavator Buckets When Using Quick Coupling Devices
- NIOSH: struck-by injuries and quick-coupler prevention factors
- UK HSE: excavator use and lifting questions
- ISO 4413:2010 hydraulic-fluid-power safety requirements
- ISO 13031:2016 quick coupler standard record
- ISO 13031:2016/Amd 1:2025 amendment record
- Caterpillar: finding excavator lift capacity
- ForConstructionPros: attach safety to quick-coupler operation
- Google Patents: automatic quick hitch for an excavator
- Geith: Tony McKeown interview on ISO 13031
- IAARC: Smart Quick Coupling System for Safe Equipment Attachment Selection and Operation