Get in Touch with Liehuang Company
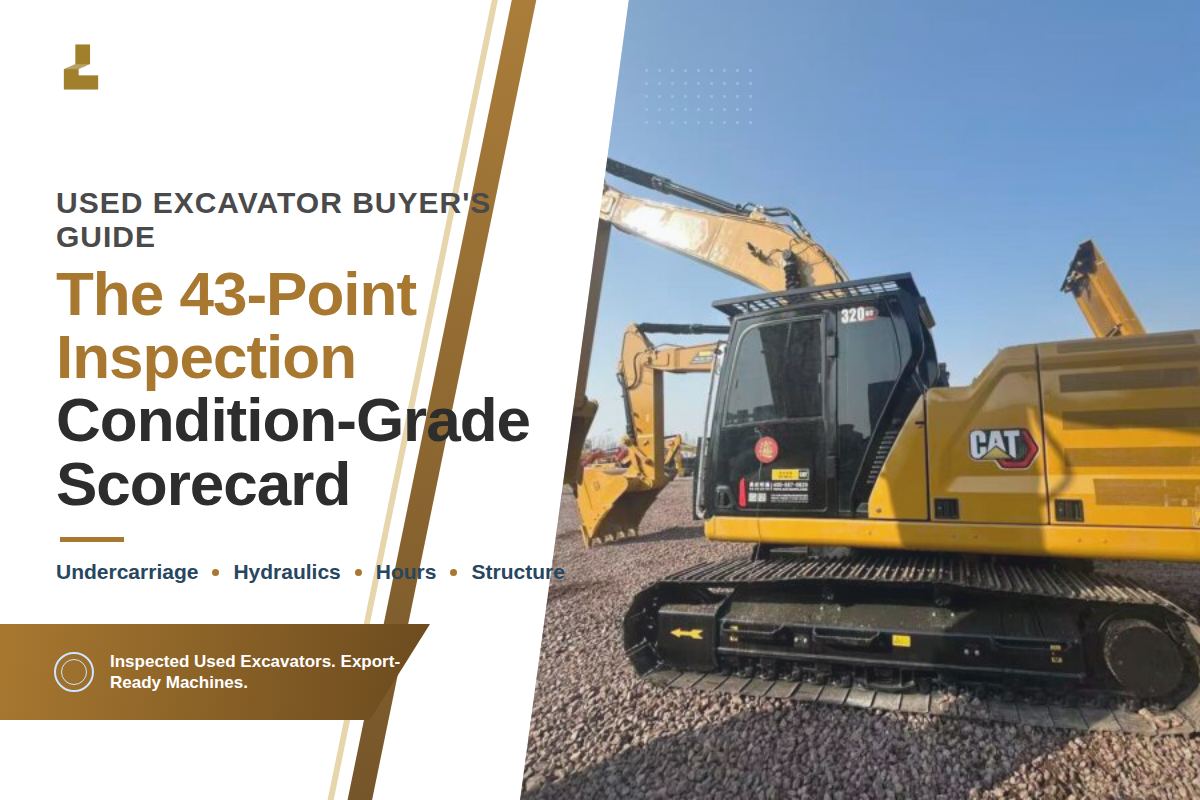

A used excavator inspection checklist is a structured, gradable list of pre-purchase checks that turns what you see into a buy, negotiate, or walk number across a machine’s five cost-critical zones. Fresh paint and a low hour meter tell you nothing about the four component groups that carry the real money: the undercarriage, the hydraulics, the structure, and the engine. This checklist is built as a fillable scorecard – you grade 43 checkpoints across five zones, add up the result, and walk away with a clear buy, negotiate, or walk decision instead of a gut feeling.
Prefer the narrative version that explains the reasoning behind each check?
See our full field method for inspecting a used excavator. This page is the scorecard you fill in at the yard.
Checklist at a Glance
| Time needed | 1–2 hours: cold walk-around plus a warm test operation |
| Tools to bring | Track measuring gauge (~$250), magnetic dial indicator, stopwatch, 25 ft tape, flashlight, phone camera |
| Documents to demand | Service history, ECM/hour report, model + serial plate photo, ownership record |
| Top 5 deal-breakers | Milky/foamy oil, re-welded boom cracks, measured undercarriage under 30%, meter that does not match wear, no service records |
| Output | A 43-point grade → buy, negotiate, or walk |
What a Complete Used Excavator Inspection Checklist Must Cover
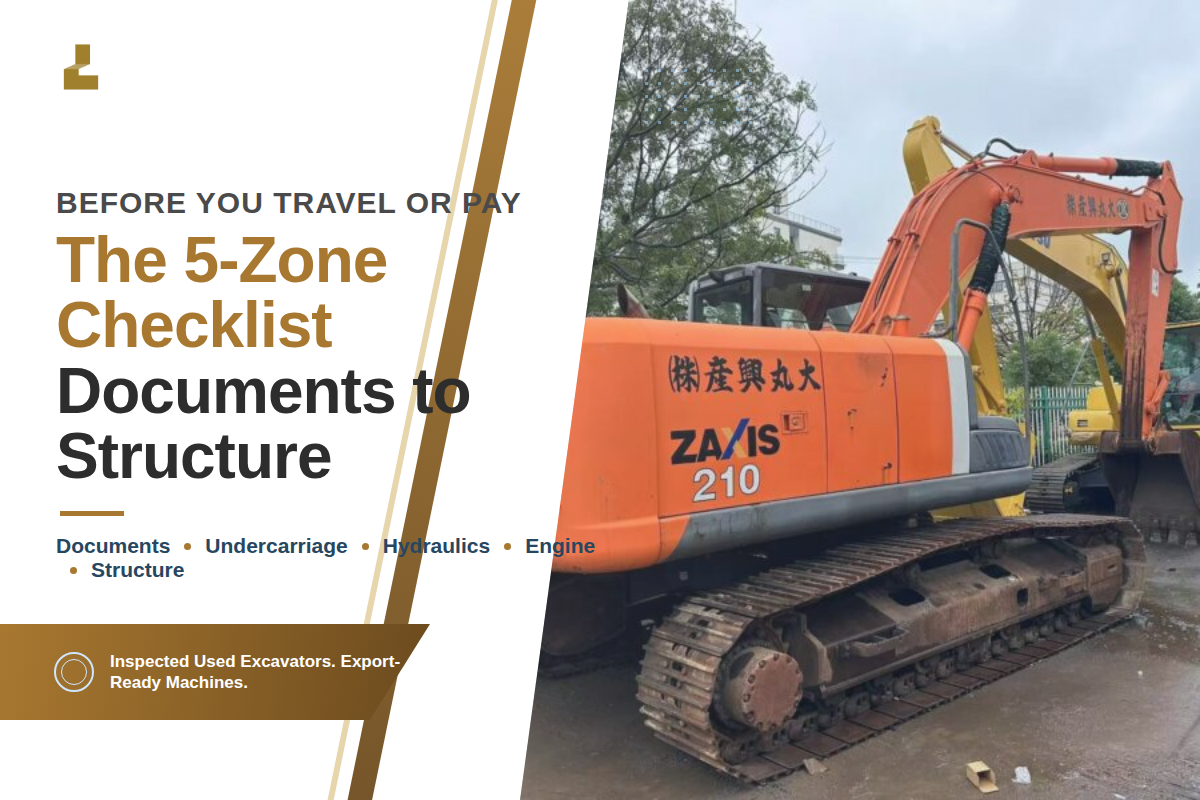
A complete used excavator inspection checklist covers five zones in order of cost risk: documents and hours, undercarriage, hydraulics, engine and cooling, and structure – then a warm test operation to confirm everything works under load. Grade each checkpoint, and the total tells you whether the machine is worth its asking price. That structure is what separates a buyer’s checklist from a daily safety check.
This matters because most buyers inspect in the wrong order. They start with the cab and the paint – the cheap stuff – and run out of patience before they reach the undercarriage, which can carry 40% to 60% of a machine’s lifelong owning cost according to Equipment World.
Those five zones are ranked so the money items get inspected while you still have the daylight and the patience to measure them properly.
This framework – the 5-Zone Used Excavator Inspection Checklist – is deliberately built around a scorecard.
Every checkpoint you fail becomes a repair line item with a dollar figure, and the sum of those figures is your negotiating position. Worn parts aren’t a reason to panic; each is a reason to lower the offer or walk with your deposit intact.
💡 How the scorecard works
Each of the 43 checkpoints scores 1 point when it grades Good or Satisfactory, 0 when it needs repair or replacement. Critical items marked as deal-breakers override the score: any single one sends the machine to “walk” regardless of the total. Score bands and the full table are in Zone 6 below.
Zone 1: Documents and Hours to Confirm Before You Travel
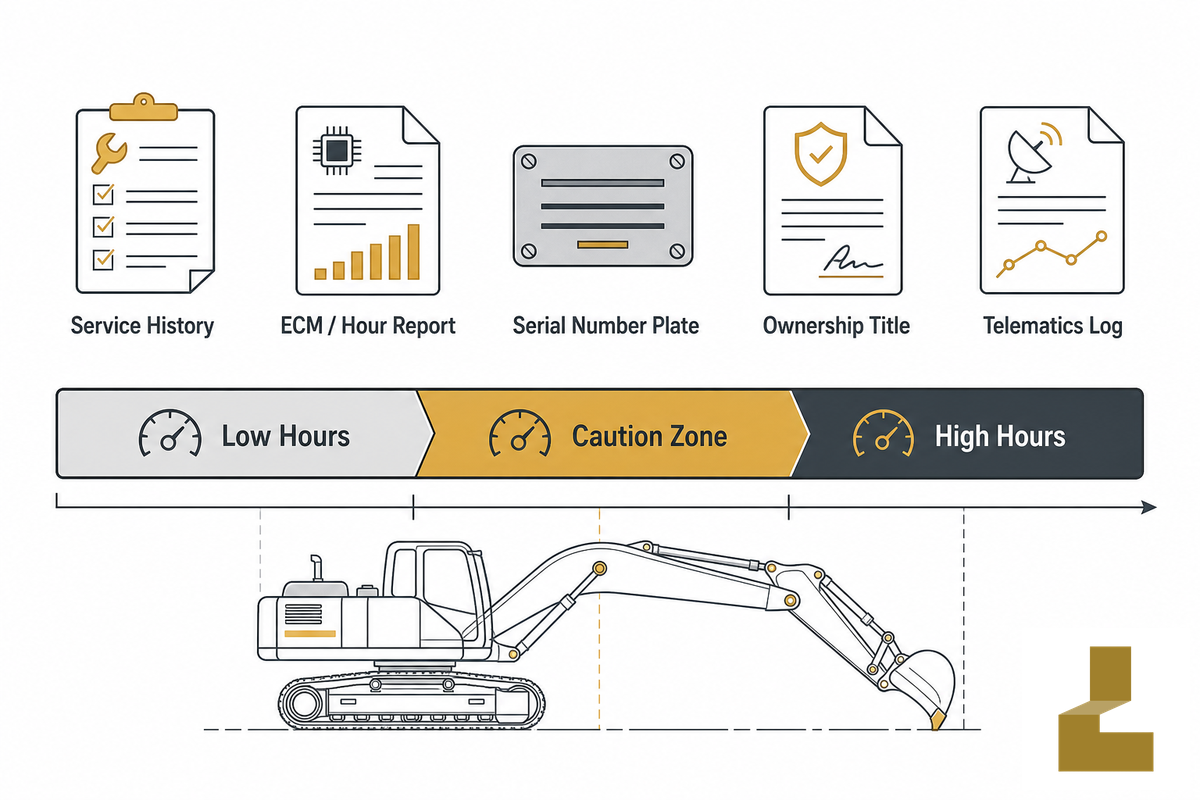
Confirm the paperwork and the real hours before you spend a dollar on travel or a third-party inspector. Lock down the service history, the ECM (engine control module) hour readout, the serial and model plate (which fixes the generation, operating weight, and rated bucket capacity), and the ownership record.
If any of those are missing, the hour meter on the dash is just a number with no evidence behind it.
Hours are the first number on any list that most buyers look at, and the least meaningful one. Service records are much more meaningful than raw hours: You can read on heavy-equipment forums that excavators at 6,000 hours need pins and bushings and an entirely new undercarriage because they’re worked to death with zero grease and on the other side of the fence, an excavator with 10,000 hours, if well documented, may run clean. You can’t automatically equate low hours to a good machine. Properly serviced, a higher-hour machine will outlast an un-serviced, lower-hour one.
How many hours is too many for a used excavator?
Hour thresholds are caution zones where you dig deeper, not hard limits. The right band varies with machine class and, above all, with maintenance history: a mini excavator raises questions sooner than a heavy one, and a documented service record can justify buying well past the typical caution range. Read the meter against the records, never on its own.
| Excavator class | Caution zone (hours) | What drives the number |
|---|---|---|
| Mini / compact (≤10 t) | ~5,000+ | Rubber tracks and pins wear early under light-duty cycling |
| Standard (10–30 t) | ~8,000–10,000 | Most common resale band; service history sets the value |
| Heavy (30 t+) | ~12,000–15,000+ | Built for long life; undercarriage cost dominates the decision |
⚠️ Verify hours against the ECM, not the dash
Hours can be manipulated – rollback hours, meter swaps, or a reprogrammed display. The “altered meter” disputes show up in courts regularly. By 2026, pulling ECM hours or telematics hours is considered a standard practice, and a refusal to provide an ECM reading is a serious warning sign. Always compare the meter hours to ECM hours and the hour stamp on service entries. If there’s a discrepancy of more than 10%, consider the hours unverified. You can use a true-hours sanity checker, or get a more in-depth explanation on how many hours is too many for an excavator.
Zone 2: Undercarriage, Measure, Don’t Eyeball
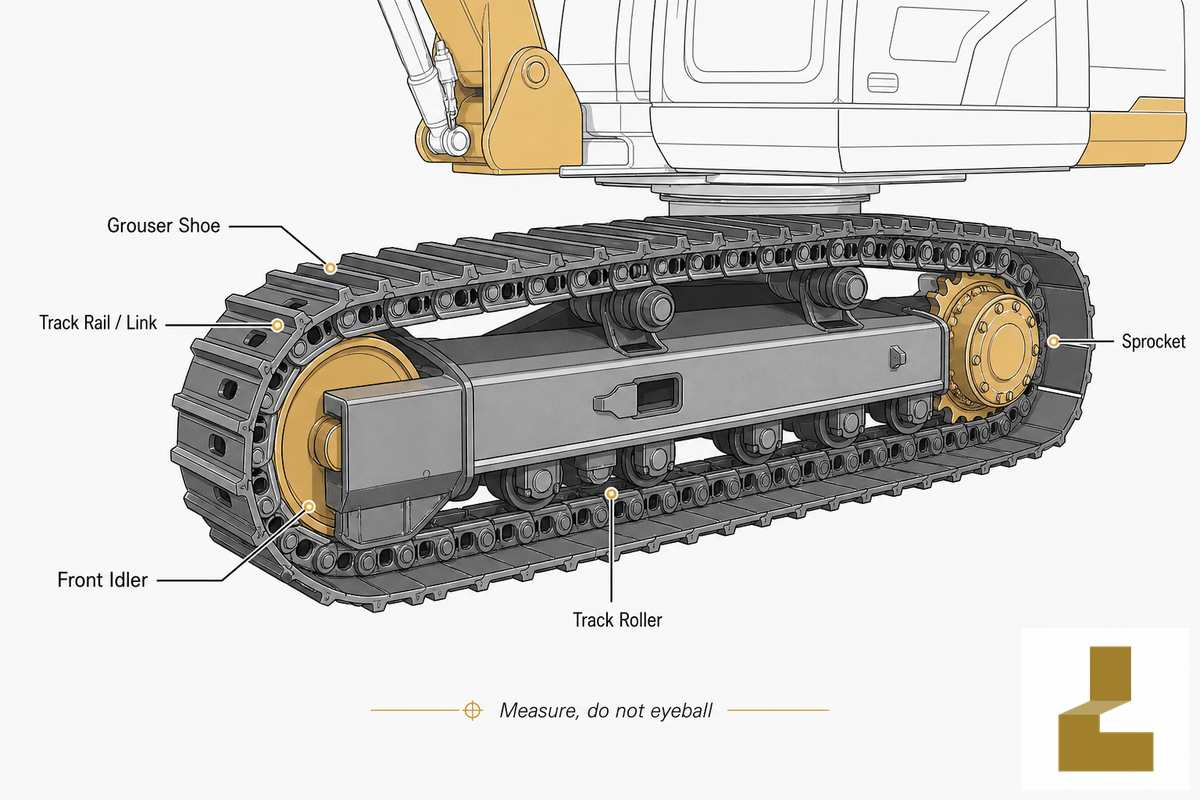
If there’s only one zone you’ll check, check the undercarriage. It accounts for about 40% to 60% of the machine’s lifetime ownership cost, and the replacement cost of an undercarriage on a 20-ton machine will be approximately $12,000. Looking at tracks is the most frequent mistake even the most experienced operators make; because each of the five components of the undercarriage (grousers, track chain, track rollers and carrier rollers, sprockets, idlers) wears at a different rate, and even “60% undercarriage” can hide a 40% set of rollers under 70% chains. Also look at each track motor final drive housing for leaks.
| Component | What to measure | Not suitable if |
|---|---|---|
| Grousers (pads) | Depth gauge across the pad height | Grouser worn flat / cracked pads |
| Rails / chain | Pin-to-pin over five links (catches pin and bushing stretch) | A link removed to hide stretch (short count) |
| Rollers (track + carrier) | Outer diameter on each roller; look for oil weeping | Oil leaking from a roller seal |
| Sprockets | Tooth profile — hooking or “pointed” teeth | Sharpened/hooked teeth throwing chain |
| Front idler | Flange wear and tracking; frame for dents | Idler at full forward travel with slack chain |
📐 Engineering Note — Reading remaining undercarriage life
Measure each component of the undercarriage with a track measuring group (approximately $250 from a dealer) then check the new-dimension and wear-limit figures in the service manual. Add the wear percentage on each component to arrive at an overall undercarriage condition percentage then determine the dollar value: On a 20-ton machine, “50% undercarriage” is effectively a five-figure liability to be subtracted from the offer. There are advancements in this area like the sensor wear monitor described in US Patent 9,371,630 but a manual track gauge remains the most commonly used.
Count the number of track links in the chain against the original factory count. Many owners take out a link on an old chain to keep it snug, and a low count signals internal wear, not a deal. This criterion applies mostly to the 10-30 ton medium excavator classes that most buyers target.
Zone 3: Hydraulics, The Drift Test and Fluid Read
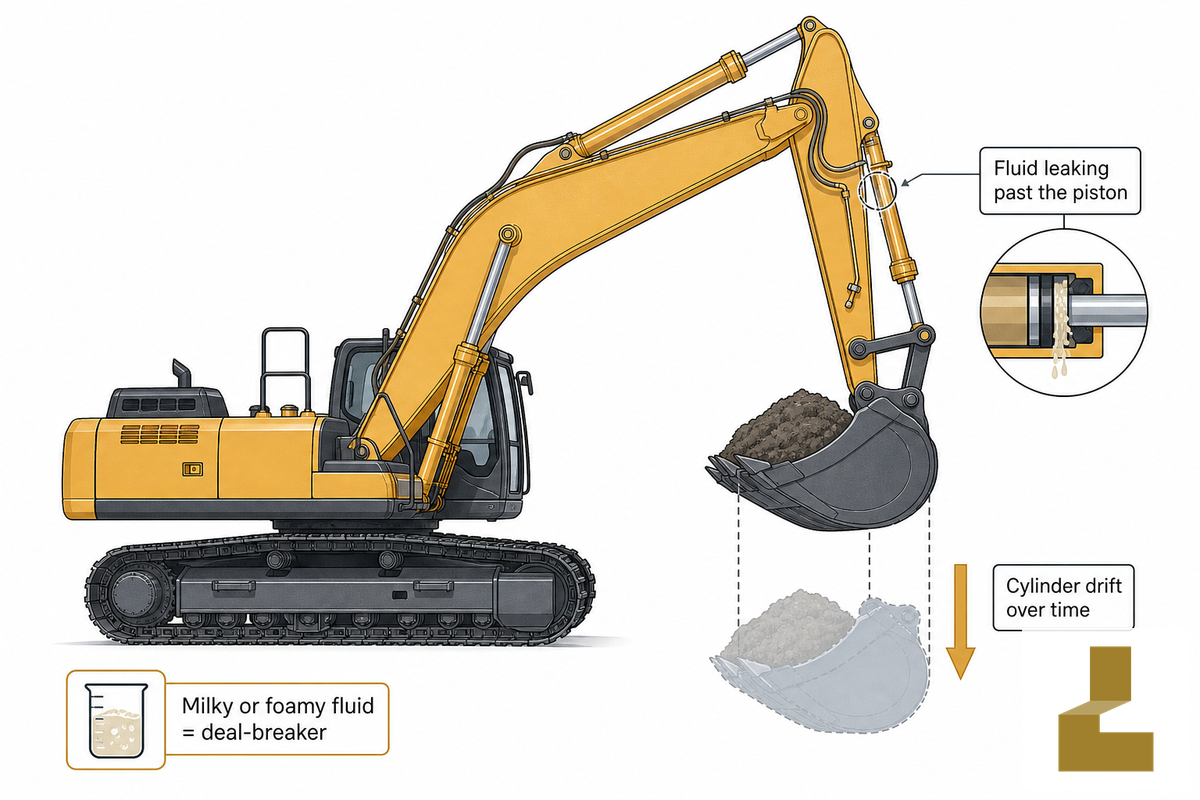
You can find many minor leaks during your inspection of the hydraulic system, by conducting a cylinder drift test and by checking your hydraulic fluid. These tiny drips turn into a $12,000–$15,000 bill if the main pump or control valve is tired or bypassing. Prior to startup on a cold machine, crouch under the unit to seek leaks. If a seal is dripping, it’s inexpensive to repair; however, main hydraulic pump leaks necessitate a replacement soon. Listen for a whine or knock as the arm reaches full extension; that noise can point to pump cavitation – air or a starved inlet pulling the pump toward damage – so use your ears as much as your eyes. Resealing a boom or stick hydraulic cylinder typically costs around $2,500 a pop.
📐 Cylinder drift (creep) test
- Lift the machine up with a loaded bucket, then switch the engine off.
- Wipe the boom cylinder rod and put a mark somewhere on it.
- Wait five minutes.
- Note the distance the boom has dropped. A slight drop is okay, but if there’s excessive settling, you’ll likely need to replace the control valve body or cylinder.
Drift isn’t just an excuse for not getting a defect found – it’s exactly what a defect inspection should be checking for. When fluid internally leaks past a cylinder piston, the uneven pressures caused by the fluid cause it to drift, or to sag. You’ll discover the defect by loading the cylinder and shutting the valve, then measuring any settling. While you’re checking, review the hydraulic fluid: if the oil is milky or frothy, it may have been contaminated with water or coolant, which is a deal-breaker for almost any machine. Similarly, inspect engine oil on the dipstick; if it’s dark, you know it’s time for an oil change. OSHA’s construction rules treat this kind of leak-driven drift as an inspectable equipment defect (29 CFR 1926.602).
Zone 4: Engine, Exhaust and Cooling Signals
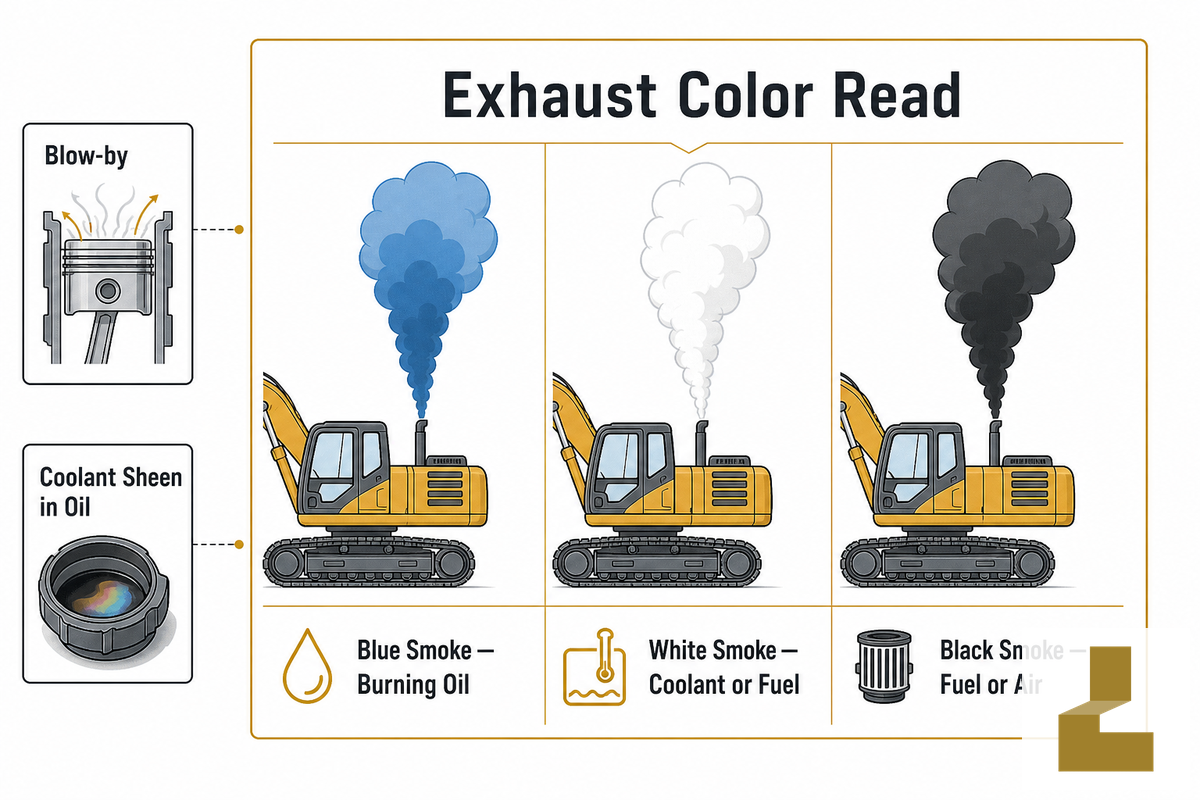
Start up the engine on a cold machine, then read the exhaust smoke color-the cheaper method of finding engine wear is to observe it from behind. Any extended plumes of colored smoke after a short start will tell a different story. You may also want to test for blow-by around the oil fill cap, and check the fluid in the coolant reservoir for coolant contamination-traces of oil in the coolant point to a failing head gasket or a cracked liner, not a cheap fix. A cold-start engine read is part of the pre-use inspection OSHA expects for earthmoving equipment (29 CFR 1926.600), and diesel color also ties back to engine emissions condition.
| Exhaust color | Likely cause | Action |
|---|---|---|
| Blue | Burning oil — worn rings or valve seals | Price an engine risk in; walk on minis |
| Persistent white | Coolant entering the cylinder | Deal-breaker — internal risk |
| Thick black | Fuel or air-intake / injector fault | Deduct service cost; investigate |
Take the operator’s seat in the cab. If there’s a torn seat, faulty gauges, unresponsive control buttons, or cracked glass, you may need to assume it was subjected to excessive use. End your examination by checking for obvious wiring problems, such as faulty lights, shorted wires or a loose battery terminal. Also be sure to read your machine’s onboard diagnostics display for error codes, and confirm any grade control or GPS machine-control system powers up and holds its calibration.
Zone 5: Structure, Cracks, Pins and Swing-Bearing Play
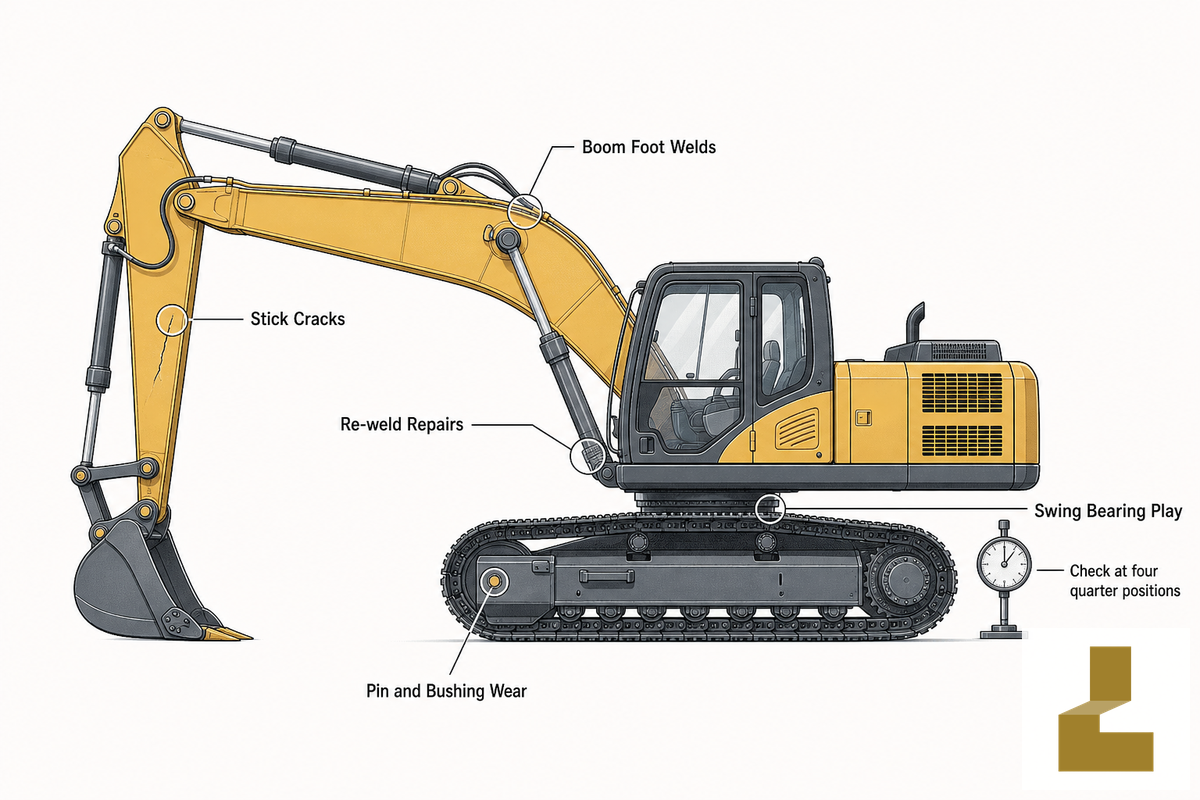
Examine both ends of the boom and stick for any visible cracks, especially along the weld lines. If any repairs to cracks have been made, they should have been plated, which indicates that the machine was subjected to some unusual forces. Trust the repairs that come with a weld procedure and a mill test certificate for the plate that was added; a bare grind-and-paint patch earns no such trust. Cracks will cost more to fix than any other flaw. While you are at the rear, check the counterweight mounting bolts for looseness or elongated holes, both signs the machine has been overloaded.
“Cracks reduce a machine’s value by about 20%. Small to midsize excavators with cracks, I tend to steer clear of.”
Howard Abell, equipment appraiser, via Equipment World
On to the pins and bushings of the linkage. While the operator is applying and releasing bucket pressure down, you’ll want to check each of the bushings to see if there’s any wobble, which indicates that the machine was likely used under-greased. While you’re working on this, be sure to check the bucket teeth and cutting edge at the working end-read about that in our guide to excavator bucket types and wear points.
📐 Engineering Note — Swing bearing (slew ring) play
The swing bearing is an expensive replacement to undertake, so be sure to test its wear. To do this, put a dial indicator in the center of the turntable bearing, then spin the body to measure deflection in four 90-degree positions, which include the 12, 3, 6, and 9 o’clock positions. If there’s more than the slight deflection expected in a 20-ton machine, you’re likely dealing with a well-worn bearing. Be sure to inspect your swing gearbox oil for water, which can cause problems with lubrication and bearing life.
The Warm Test Operation: Four Dynamic Checks

Static checks catch damage; warm tests check performance. At operating temperature, perform these four checks; they distinguish a workhorse from a dead horse.
- Cylinder speed – Time each function (boom, stick, bucket) across its full range of travel three times and average it. Slow cycle times indicate a tired cylinder or weak hydraulics.
- Swing – Go full 360° in both directions and listen to the swing bearing; it should run quietly and smoothly without grinding or groaning.
- Travel and tracking – drive straight in a slow, steady manner, forward and backward. The machine shouldn’t pull to one side; if it does, the travel motor and/or pump on the opposite side is losing pressure. Time three full track rotations on each side.
- Drift with load – Retest boom drift with the machine hot, to check for leaky seals that won’t reveal themselves at cooler temperatures.
Finish like a pro: While the machine is hot, remove the service panels and look under pressure for signs of fluid weeping. A clean, dry machine at temperature is a good machine. According to OSHA’s standards (29 CFR 1926.602), earthmoving equipment must be inspected and monitored under operating conditions-the same idea that should guide your buying process.
The Condition-Grade Scorecard: Turn Findings Into a Number
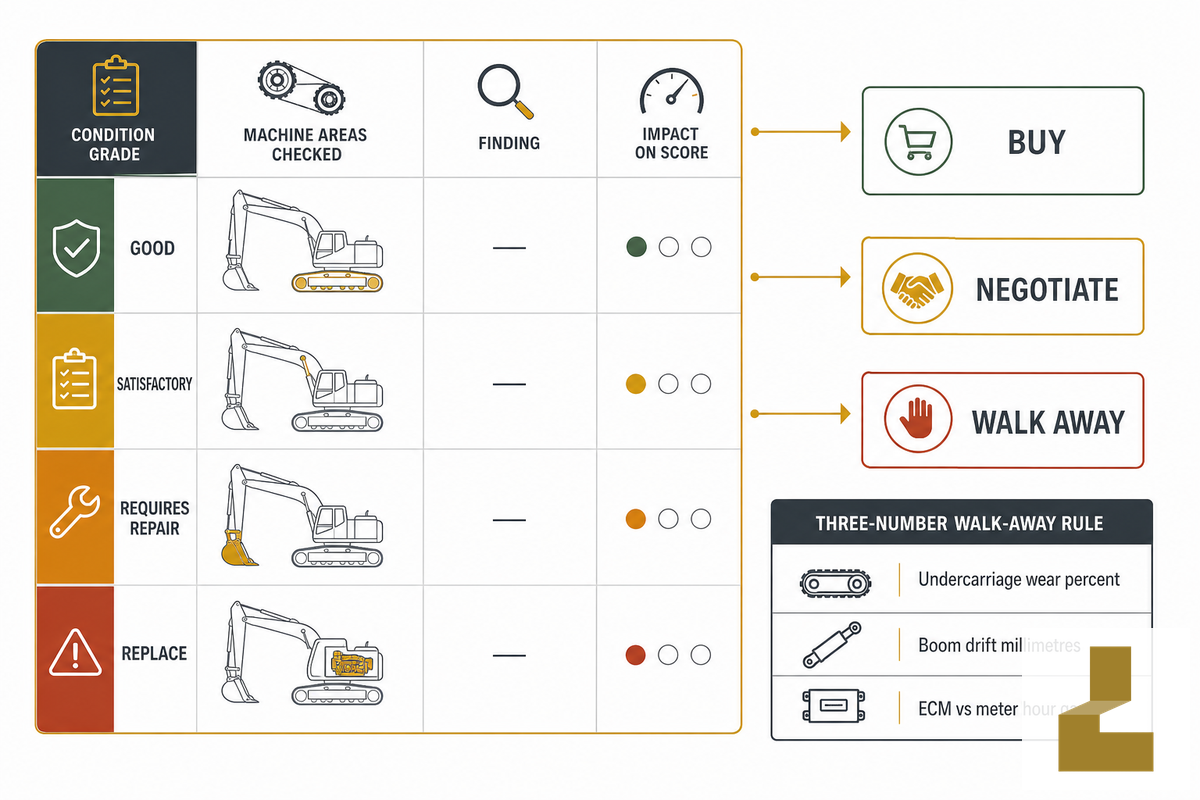
Consolidate five categories into a single number with the 43-Point Condition-Grade Scorecard. Award 1 point for every checkpoint listed as Good or Satisfactory, 0 points for anything that needs repair or replacement, and then consult the rating bands. A non-negotiable issue invalidates the total and earns the machine an instant “walk.”
| Zone | Checkpoints | Deal-breaker that overrides the score |
|---|---|---|
| 1 — Documents & hours | 8 | No service records / ECM refused |
| 2 — Undercarriage | 10 | Measured remaining life under 30% |
| 3 — Hydraulics | 7 | Milky oil or heavy pump leak |
| 4 — Engine & cooling | 6 | Persistent white exhaust (coolant) |
| 5 — Structure | 8 | Re-welded / plated boom or stick crack |
| 6 — Warm test | 4 | Excessive warm drift or track pull |
| Total | 43 | Any single deal-breaker = walk |
| Band: Buy | 37–43 | Sound machine; proceed at asking |
| Band: Negotiate | 28–36 | Subtract repair costs from the offer |
| Band: Walk | Under 28 | Repairs erase the savings |
The 3-Number Walk-Away Rule
Walk away if any one of these three figures raises a red flag, regardless of your score:
- Undercarriage has less than 30% of its lifespan remaining – A close-to-$12K (or more for larger machines) near-future replacement on a 20-ton model.
- Boom drift exceeds ~50 mm (2 in) within five minutes – Likely an issue with a bypass cylinder or valve.
- Discrepancy between ECM hours and the meter over 10%, or hours that can’t be independently verified – Untrustworthy hours throw doubt on all other metrics.
Worked example: Let’s say a standard 22-ton machine gets a score of 34 out of 43. This warrants a Negotiate. Two points fell short: a 45% undercarriage (about $6,000 toward replacement) and two boom cylinders due for reseal ($2,500 each). That adds up to roughly $11,000 in near-term repairs that you subtract from the asking price before shaking hands. See “The Red Flags: Deal Breakers vs. Negotiable Issues” below for what to walk away from and what to negotiate.
| Red flag | What it signals | Action (and where it does not apply) |
|---|---|---|
| Milky / foamy oil | Water or coolant intrusion | Walk — internal risk on any class |
| Re-welded boom crack | Overload, structural fatigue | Walk on mini/mid; expert check + heavy cut on large units |
| Undercarriage worn on measurement | Near-term five-figure spend | Subtract replacement cost; not a walk if priced in |
| Hours don’t match wear | Possible rolled-back meter | Demand ECM pull; walk if refused |
| No service records | Unknown maintenance history | Order a third-party inspection or walk |
Once you have a grade and a repair tally, price the machine against what these models actually move for. These are the FOB reference bands we see on our own export stock; hours, undercarriage percentage, and attachments swing a specific unit within the band, which is exactly what your scorecard is measuring.
| Model | Class / operating weight | Typical FOB range (USD) |
|---|---|---|
| Caterpillar 320 | 20–22 t (21,900 kg, 121 kW) | $25,000–$58,000 |
| Komatsu PC200 | 20 t | $25,000–$58,000 |
| Hitachi ZX210 | 22 t | $25,000–$52,000 |
| Volvo EC480 | 48–50 t | $55,000–$95,000 |
| Kubota U35 | 3.7 t mini, zero-tail | $13,000–$22,000 |
To verify the total purchase cost after calculating a score, you can use our landed-cost estimator to add freight and import fees on top of the FOB price, and our used excavator buying guide places the scorecard within a larger decision process.
Inspecting a Machine You Can’t Visit: The Remote Buyer’s Request List
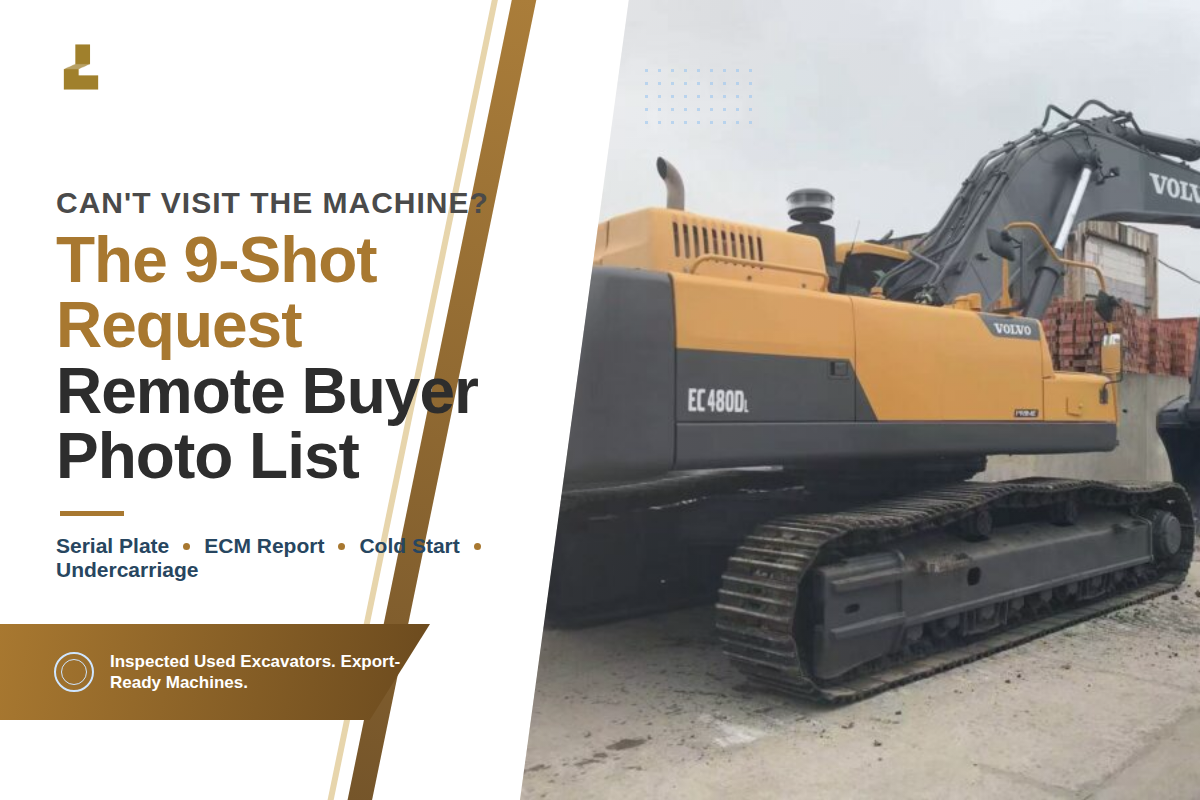
When the equipment is on the other side of the ocean, use the scorecard remotely by having the seller record videos and photos. You can’t fly to a remote lot and wait for the tracks to cool before an inspection, so the checklist requires very specific images and documents, and most forum participants will tell you that only reports verified by serial number, meter reading, and cold start are credible.
The Remote Buyer’s 9-Shot Request List — copy these into your inquiry:
| Request | What to look for | Why it matters |
|---|---|---|
| Cold-start video | Exhaust color first 30 seconds | Catches oil burn / coolant |
| Hour-meter close-up | Reading matches ECM | Verifies real hours |
| Serial / PIN plate photo | Model + generation match | Confirms the exact unit |
| Undercarriage pin-to-pin | Gauge reading on camera | Grades the costliest zone |
| Cylinder-rod pass | Rods clean, no scoring | Flags reseal/leaks |
| Weld-seam walk | Boom/stick seams, no plating | Finds structural repairs |
| Oil-clarity clip | Hydraulic + engine oil not milky | Detects contamination |
| 360 swing + travel test | Smooth, no groan or pull | Confirms dynamic health |
| Service + export docs | History, ECM, ownership | Backs every number above |
If they can’t produce them, order a third party onsite inspection and review the report before you send money. One easy way around this is to buy a used excavator that already ships with condition reports. Machines that have condition reports built in, you can browse inspected used excavators that ship with documented reports.
After You Buy: The Daily Pre-Start Operator Checklist
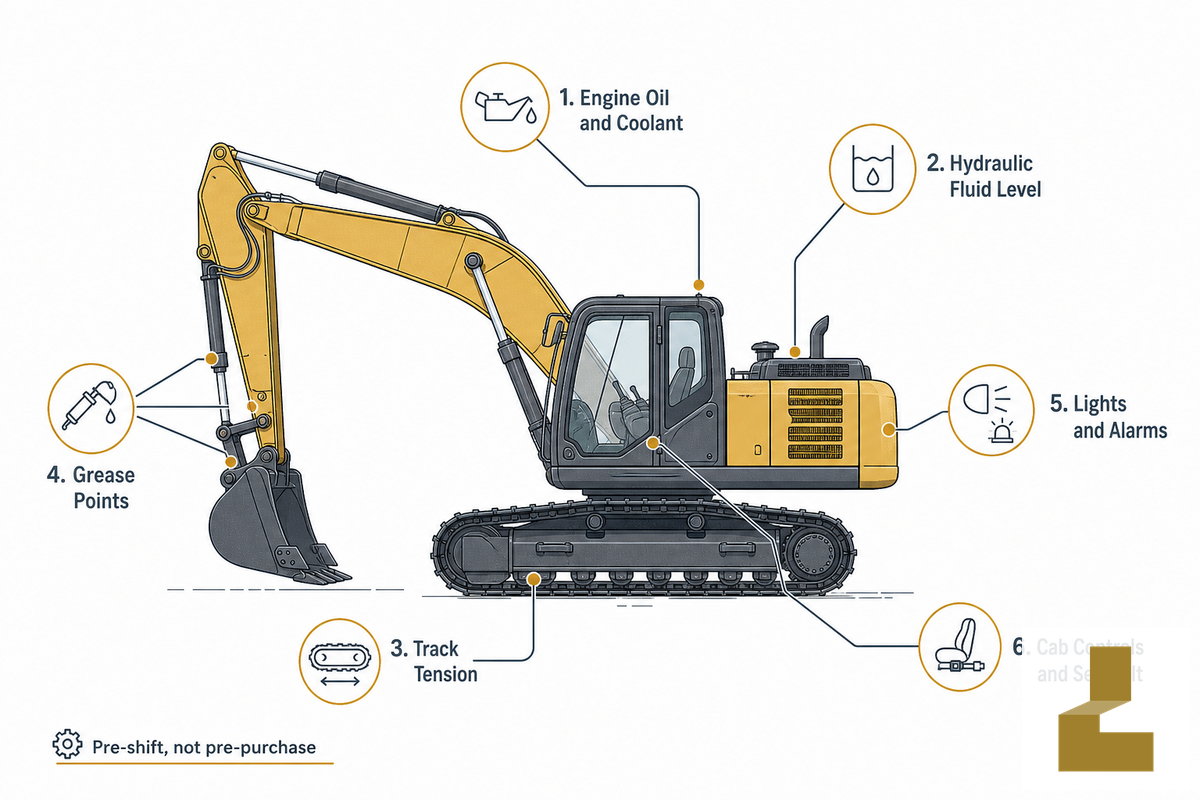
Two lists are at work here, and they serve different purposes: a one-time pre-purchase inspection guides your buying decision, while a daily pre-start inspection is what your operator runs every shift on equipment you already own. That daily routine mirrors the before-use inspection an OSHA competent person must run on earthmoving equipment (29 CFR 1926.602).
- Fluids: engine oil level and condition, coolant, hydraulic oil level, any oil drips under the machine.
- Undercarriage: track tension, evidence of severe wear or damage, dirt buildup.
- Controls and cab: responsive controls, safety seatbelt, mirrors, clear glass.
- Attachment: inspect bucket, quick coupler, and pin wear and make sure the pins have grease.
- Lights, horn, and audible warnings are all working.
Some machine quirks may merit mention on either inspection list, too: With Cat, request “diagnostic hours” from the machine’s computer. On Kubota or Komatsu, verify the hydraulic lines for the quick coupler and the thumb on a machine you see are for the attachments that accompany it. You can post this routine as an excavator safety checklist, log each item on an excavator inspection form, and fold it into the machine’s excavator maintenance checklist. Otherwise, the five regions grade machines of all makes and models.
Frequently Asked Questions
Q: What should be on a used excavator inspection checklist?
A complete used excavator inspection checklist covers five zones — documents and hours, undercarriage, hydraulics, engine and cooling, and structure — plus a warm test operation, with each checkpoint graded so the total gives a buy, negotiate, or walk decision.
We have them organized from highest cost to lowest risk; for instance, because it costs more to repair undercarriage components and hydraulic pumps than anything else on an excavator, we prefer to measure rather than eyeball them. That’s why an inspection for the most critical components will give you the best gauge of potential issues on an excavator; include checking the machine’s service history and documents, and then perform a hot test.
Q: What is the first thing to inspect on a used excavator?
Start with the documents and a walk-around for cracks, then go straight to the undercarriage and hydraulics, where the largest repairs sit — before you judge anything else.
It is always a good practice to first examine the service history and run a hydraulic test on the machine’s ECM hours before you go looking at it physically. Those components can often provide a greater indicator of a machine’s health than anything the cosmetic exterior or cab may present.
Q: How much does a used excavator inspection cost?
A self-inspection costs only your time plus a track measuring gauge at about $250, while a professional third-party inspection is usually a small fraction of a single major repair.
It only takes one bad swing motor or contaminated pump to make a good deal turn bad; therefore, for only a few hundred dollars (which is still relatively cheap insurance on an excavator purchase that may range from a low four figures into the hundreds of thousands), you can get a good idea of what to look for.
Q: Is a used-excavator inspection checklist the same as a daily inspection checklist?
No — a pre-purchase checklist is a one-time buy/walk decision with measurements, while a daily pre-start checklist is a quick safety routine the operator repeats each shift.
The pre-purchase inspection will serve as your bargaining tool in the negotiation and guide you through price points for that particular machine. On the other hand, a pre-start inspection ensures a machine you’ve already purchased will be out of the shop, safe and operational for your team.
Q: What paperwork should come with a used excavator?
At minimum: service and maintenance records, an hour or ECM report, the model and serial number, and ownership history — plus export certificates and any inspection or condition documentation for imports.
For a new machine, request access to its OEM service history and the computer hours for additional detail regarding how the equipment has been used (not just hours in operation). A seller unable to produce these is requesting that you make an uninformed purchase based on trust alone. Treat it as an issue to resolve; not as a hurdle to skip over.
Q: Can I get a completed inspection report from the seller before I pay?
Yes — a serious exporter should provide a condition report tied to the exact machine — serial, hour meter, and cold-start video — before any deposit, or accept an independent third-party inspection in its place.
Ensure any inspection result you review is presented in writing and tied to the machine’s serial and hour reading, and do not wire your deposit until you receive a satisfactory copy.
Why We Built This Scorecard
As an exporter of reconditioned and tested excavators, we test every machine before we load it with undercarriage measurements, drift test data, swing-bearing reports, and include condition reports with our equipment; our inspection scorecard for all of our used excavators gives you the tools you need to inspect and price every machine for yourself. By the technical team at Liehuang Used Excavators.
Would you rather we ran this checklist for you before you buy?
Every excavator we send out for export is examined, refurbished and tested. A report on its condition can be sent to you.
References & Sources
- 29 CFR 1926.602, Material handling / earthmoving equipmentU.S. Occupational Safety and Health Administration
- ISO 6165:2022, Earth-moving machinery, Basic typesInternational Organization for Standardization
- Undercarriage owning-cost share (40–60%)Equipment World
- Inspection Checkpoint: How to inspect a used excavatorEquipment World
- Free printable equipment inspection checklist (track gauge ~$250)Equipment World
- US Patent 9,371,630, Undercarriage idler and roller wear determinationUSPTO / Google Patents